

Freshening up a neglected Baikal MP654-K (Gen 3)
Mar 13, 2022 2:08:24 GMT
HeadHunter, Modski66, and 2 more like this
Post by twodoctors on Mar 13, 2022 2:08:24 GMT
This is a follow-on from my Baikal MP654 review. Sticking this in the correct section so it is "easier to find" in future.
co2-handguns.freeforums.net/thread/2235/baikal-mp-654k-gen-review
As a catch-up, there is a leak in the mag; the gun is just bone dry; trigger is super heavy; it's inaccurate even in SA.
So first thing first. Change all the seals.
I have the Gen 3 gun, but all the mags are pretty similar in the valve part. I forgot to take photos in the early stage of the disassembly, but it's not difficult to work out what to unscrew.
You need to review the CO2 actuator (where the firing pin strikes the rear of the mag) and the CO2 bulb nut. The gun came with a tool for the CO2 actuator/valve assembly. That should be straight forward enough.
Top one is the supplied tool

The CO2 bulb nut is a lot more tricky. The supplied tool doesn't quite fit into that area. You have to do a MacGyver with this one. I used a small allen key (1 or 1.5, not sure).


It just fits perfectly. Hopefully you'll have one of those already from another pistol you've bought. Usually used for adjusting sights.
And when it's done, there are 2 seals to change. It's all in the manual anyway.

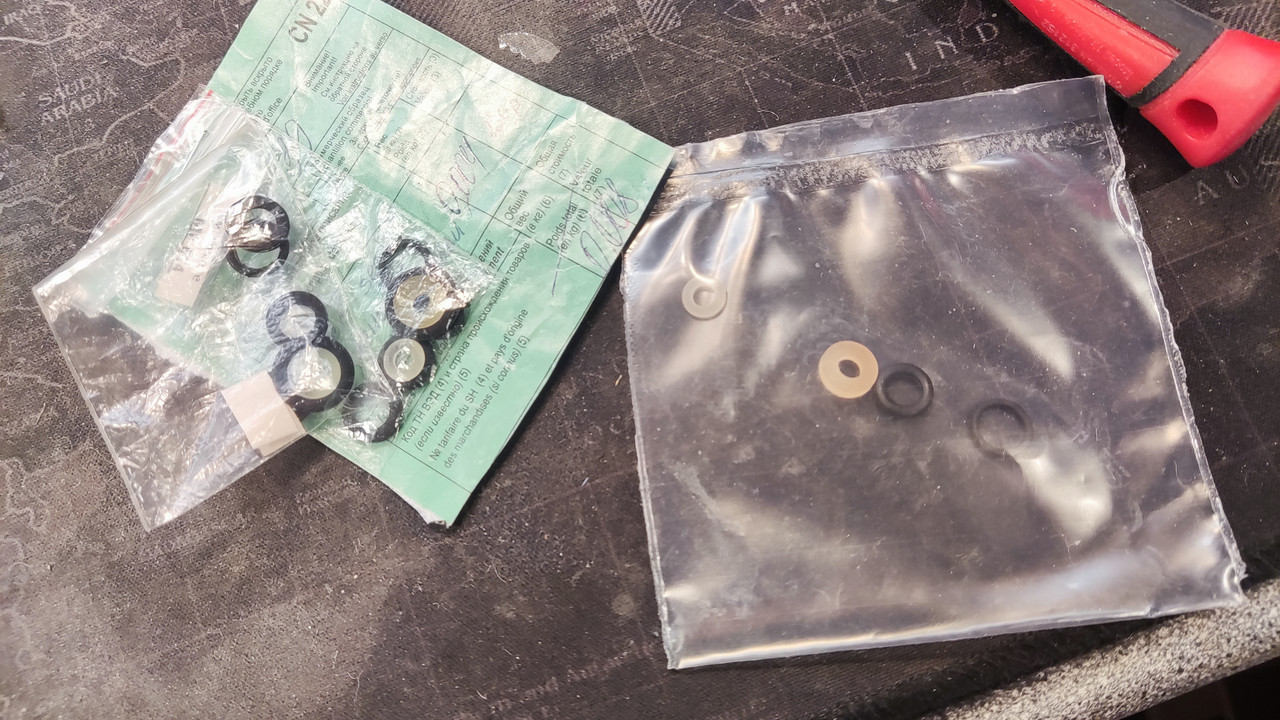
Fortunately mine came with 3 sets of seals. I opened the one that looks the newest. It should be fairly straightforward.
The CO2 nut, that was a bit more tricky. Once removed, make sure you don't lose that filter. Remove the seal on the nut itself and the nut should separate from the magazine frame.

The CO2 seal in the nut itself was a right bugger to remove. I used various different tools, from (Moorfield) forceps, to stanley/craft knives, and that flat end of the allen key from earlier. In the end it came away with the craft knife.
Even prior to removing, it was obvious that the gun is old, not not been used for a while. Seal not been changed, and the seller probably knew it was leaking. Naughty! And perhaps that's why he was willing to offload it for not a lot of money. Just look at that yellow thing. That's a "before" shot.

Eventually got it out.

Pushing the new seal in was also interesting. The seal is slightly oversized, so it doesn't just drop in. I used one of my crafting stick I bought from Wilko ages ago to gently push it back in.

So that was 4 seals renewed. I have 2 more in the bag. 🤯
I could not work out where they should live. Certainly 4 in 4 out so far. Not missed anything obvious. Perhaps they are for the newer gen of magazine. I don't know.
So that was the magazine done. Not tested it yet as it was 12am. I'll gas it up when I know I will be able to shoot.
And the gun?
Well, there was another seal that I can change. There is one at the breech end of the barrel. Took it out and it was all squashed. Could this be the cause of my hook shots? Could this be giving my BBs random backspins?
New vs old, front and back


Still that one seal left. I put it back in the bag.
Let's have a look at the gun.
I have not attempted to fully disassemble it yet. Found a YouTube video for the disassembly. It's not that complicated, but the guy in the video used a very distracting mat/carpet/towel to rest his parts on, so it's not very easy to see what's going on. I can have a go on writing a guide if there is demand for it.
I took the grip off, which was easy enough. From my own observation, (and I'm not a proper gunsmith) the action has some resemblance to the leaf spring (for the hammer) found in a 1911. I have taken my 22LR one apart before so that's how I (kind of) know. This has 2 limbs instead of 3: 1 for the hammer and one to tension the sear. I don't think there is anything I can do that will dramatically reduce the trigger pull weight unless I polish/smoothen the sear contact. I know what I need to do, but I have no spares in case anything goes wrong (and they can). I'll just keep it simple with this one.

First thing you'll notice is how rough things are inside. Obviously this is magnified, but it is rather rough on the frame and some parts. They would contribute to the pull weight, but polishing it won't make this a 2lb trigger! At least I won't bother about this part.

And as you pull the trigger (in DA) or cock the hammer (in SA), that sear is riding on some rough surface. As I said polishing will help a bit. I just greased it instead as I'm a bit lazy...
To take it to the next level, softening the sear will make the trigger release a lot smoother, which will become a bit more apparently in the next photo.

As you can see, once the sear is locked into that groove in the hammer, the angle it needs to overcome is very steep. You are essentially fighting against the hammer leaf spring, that obtuse angle in the groove, and the roughness of the surfaces. The power is a bit low already, so lightening the leaf spring don't make sense. Polishing the surface may help a bit, but the best (and most dangerous) thing to do is to smooth out the sear so it can ride out of the groove easier. Don't touch that groove though, however tempting that might be. Overdoing it would stop the hammer from locking (or worse the sear slipping out) which, in a firearm, might lead to double tap or full auto! That is why the trigger is so heavy.
I took the easy way out tonight. I just dumped loads of my favourite grease in that area... just a slob of moly grease, and some gun oil in the area I can't easily get to. I only use the automotive stuff as they are about £10 per tube (a few years ago). Some gunsmith try to sell something similar looking for £5 for a 5ml container. The K2 grease is also my more expensive oil, and I would add that other grease would be fine also.
And what a surprise. The trigger pull in DA is probably close to 10lb now. It feels like my DW715 in DA. Heavy but more controllable (if only the over travel was shorter!). In SA, the moly grease on the sear / hammer area did help.
Feels a bit better about the gun now. Hopefully the accuracy will improve in the next outing!
co2-handguns.freeforums.net/thread/2235/baikal-mp-654k-gen-review
As a catch-up, there is a leak in the mag; the gun is just bone dry; trigger is super heavy; it's inaccurate even in SA.
So first thing first. Change all the seals.
I have the Gen 3 gun, but all the mags are pretty similar in the valve part. I forgot to take photos in the early stage of the disassembly, but it's not difficult to work out what to unscrew.
You need to review the CO2 actuator (where the firing pin strikes the rear of the mag) and the CO2 bulb nut. The gun came with a tool for the CO2 actuator/valve assembly. That should be straight forward enough.
Top one is the supplied tool
The CO2 bulb nut is a lot more tricky. The supplied tool doesn't quite fit into that area. You have to do a MacGyver with this one. I used a small allen key (1 or 1.5, not sure).
It just fits perfectly. Hopefully you'll have one of those already from another pistol you've bought. Usually used for adjusting sights.
And when it's done, there are 2 seals to change. It's all in the manual anyway.
Fortunately mine came with 3 sets of seals. I opened the one that looks the newest. It should be fairly straightforward.
The CO2 nut, that was a bit more tricky. Once removed, make sure you don't lose that filter. Remove the seal on the nut itself and the nut should separate from the magazine frame.
The CO2 seal in the nut itself was a right bugger to remove. I used various different tools, from (Moorfield) forceps, to stanley/craft knives, and that flat end of the allen key from earlier. In the end it came away with the craft knife.
Even prior to removing, it was obvious that the gun is old, not not been used for a while. Seal not been changed, and the seller probably knew it was leaking. Naughty! And perhaps that's why he was willing to offload it for not a lot of money. Just look at that yellow thing. That's a "before" shot.
Eventually got it out.
Pushing the new seal in was also interesting. The seal is slightly oversized, so it doesn't just drop in. I used one of my crafting stick I bought from Wilko ages ago to gently push it back in.
So that was 4 seals renewed. I have 2 more in the bag. 🤯
I could not work out where they should live. Certainly 4 in 4 out so far. Not missed anything obvious. Perhaps they are for the newer gen of magazine. I don't know.
So that was the magazine done. Not tested it yet as it was 12am. I'll gas it up when I know I will be able to shoot.
And the gun?
Well, there was another seal that I can change. There is one at the breech end of the barrel. Took it out and it was all squashed. Could this be the cause of my hook shots? Could this be giving my BBs random backspins?
New vs old, front and back
Still that one seal left. I put it back in the bag.
Let's have a look at the gun.
I have not attempted to fully disassemble it yet. Found a YouTube video for the disassembly. It's not that complicated, but the guy in the video used a very distracting mat/carpet/towel to rest his parts on, so it's not very easy to see what's going on. I can have a go on writing a guide if there is demand for it.
I took the grip off, which was easy enough. From my own observation, (and I'm not a proper gunsmith) the action has some resemblance to the leaf spring (for the hammer) found in a 1911. I have taken my 22LR one apart before so that's how I (kind of) know. This has 2 limbs instead of 3: 1 for the hammer and one to tension the sear. I don't think there is anything I can do that will dramatically reduce the trigger pull weight unless I polish/smoothen the sear contact. I know what I need to do, but I have no spares in case anything goes wrong (and they can). I'll just keep it simple with this one.
First thing you'll notice is how rough things are inside. Obviously this is magnified, but it is rather rough on the frame and some parts. They would contribute to the pull weight, but polishing it won't make this a 2lb trigger! At least I won't bother about this part.
And as you pull the trigger (in DA) or cock the hammer (in SA), that sear is riding on some rough surface. As I said polishing will help a bit. I just greased it instead as I'm a bit lazy...
To take it to the next level, softening the sear will make the trigger release a lot smoother, which will become a bit more apparently in the next photo.
As you can see, once the sear is locked into that groove in the hammer, the angle it needs to overcome is very steep. You are essentially fighting against the hammer leaf spring, that obtuse angle in the groove, and the roughness of the surfaces. The power is a bit low already, so lightening the leaf spring don't make sense. Polishing the surface may help a bit, but the best (and most dangerous) thing to do is to smooth out the sear so it can ride out of the groove easier. Don't touch that groove though, however tempting that might be. Overdoing it would stop the hammer from locking (or worse the sear slipping out) which, in a firearm, might lead to double tap or full auto! That is why the trigger is so heavy.
I took the easy way out tonight. I just dumped loads of my favourite grease in that area... just a slob of moly grease, and some gun oil in the area I can't easily get to. I only use the automotive stuff as they are about £10 per tube (a few years ago). Some gunsmith try to sell something similar looking for £5 for a 5ml container. The K2 grease is also my more expensive oil, and I would add that other grease would be fine also.
And what a surprise. The trigger pull in DA is probably close to 10lb now. It feels like my DW715 in DA. Heavy but more controllable (if only the over travel was shorter!). In SA, the moly grease on the sear / hammer area did help.
Feels a bit better about the gun now. Hopefully the accuracy will improve in the next outing!


